Cold Rise Pizza Dough – for a crisp and airy crust

Crisp and airy homemade pizza dough with a rustic Italian vibe. Cold fermented for maximum flavour and an airy crust.
I’ve been making pizzas at home for years, it’s the dough I’m most familiar with and the one that I consider the most important. It’s a simple process with simple ingredients, and the key is all in the steps. My pizza making endeavours started from the age of 14, with simple homemade pizza doughs and the worst kneading skills imaginable. Since then, I’ve practiced and practiced with almost weekly pizza nights, so I’d like to think I know a fair few things about pizza dough.
I’ve experienced:
-tearing dough
-undercooked pizzas
-dropping dough on the floor
-burnt pizzas
You name it, I’ve done it.
But, that’s led me to this stage, where I was able to develop this specific pizza dough. It creates a pizza that mimics your favourite takeout spots, and I’ve done this with the everyday home-cook in mind. Speciality pizza flour is not essential, and neither is a pizza stone. Though the latter is recommended for best results, and I do use a baking steel for all my pizzas.

How the pizza dough works:
This is the most crucial part of the pizza dough. Pizza making is a combination of science and art, and frankly I think this applies to all dough. Baking in general is science, and I refer to bakers percentages whenever I’m developing any dough. There is science behind this process and I will explain everything within this blog post.
The Science:
Hydration:
300ml of water/500g of flour = 60% hydration
Hydration refers to how hydrated a dough is and it’s calculated by the weight of liquid in comparison to flour.
60% is actually relatively low, but it’s a very easy dough to work with for people new to pizza making. Therefore a higher hydration means a larger proportion of liquid and in turn, a stickier dough. Higher hydrated doughs can be tricky to manage without a decent amount of experience.
For this reason I have kept my recipe at a lower hydration to make it manageable for all. However if anyone is up for the challenge, increase your hydration, it allows for an even more airy crust.
Flour:
Strong bread flour: A higher proportion of protein and a stronger flour to allow for more gluten development. This means your dough is less likely to tear when shaping and you’ll end up with a more crisp crust. Better gluten development means more air pockets, which means an airy crust.
“00” flour: You can by all means use a 00 flour, but make sure it’s one specifically for pizza. My go-to 00 flour is Caputo “00” Blue and in my opinion it’s one of the best on the market for Neapolitan pizzas. The “00” refers to how finely ground the flour is, not the strength, and hence using a weak 00 flour is not going to work. Your pizza will tear during shaping and will not have sufficient strength. In my experience, to get the best results out of the Caputo “00” blue, you need a wood fired/home pizza oven as the flour works best at a temperature above 450’C. This isn’t possible in a home oven and hence I use strong bread flour in my recipe.
Sugar:
Sugar: I always include 0.8-1% sugar content (relative to flour weight). Contrary to popular belief this is not for the yeast, it actually allows browning of the crust during baking. If you’re using a home pizza oven or an authentic wood fired oven, then the sugar is not necessary as the oven temperature is high enough to initiate the maillard reaction. This is the reaction between sugars and proteins that causes browning and imparts flavour.
Temperature:
Oven temperature: I’ve advised a temperature of 240’C for a fan oven/260’C conventional. In my research this came up as the maximum temperature for a lot of home ovens. The main thing is that you want your oven as hot as it can get.
A home pizza oven will provide the best results, but that’s not realistic and hence my recipe is targeted for the majority of home-cooks and for regular ovens. However if you have an outdoor pizza oven – definitely use it.
Cold Fermentation:
Cold proving: Cold proving your dough slows down the yeast – which is EXACTLY what we want. Imagine a balloon, the material is the gluten, and the air inside is the carbon dioxide gas. When your dough is in the fridge, two things will happen to these ‘balloons of air’:
1) The balloon fills up at a slower rate as the yeast is slowed down
2) The balloon material gets stronger, as the gluten fibres are all aligning and strengthening.
This means that the stronger balloons can hold more air and therefore the dough ends up with a more favourable structure i.e. a more airy crust.
Another benefit of cold proving is flavour, this happens because the yeast produce more flavourful acids when placed at lower temperatures. These flavours are desirable as they add complexity and depth to your dough.
And finally, the other benefit of cold proving is the fermentation as this improves the digestibility of your finished baked good.
Why does this pizza dough rest for 72hrs?
A common question, the main reason for this was because 3 days was the longest that the majority of people were prepared to wait. Now I did pizza tests with various proving times from 12 hrs, to 24, and then every day up to 6 days. My favourite was the 5-6day batches, but this is an unrealistic time frame to expect most people to wait. Even for myself, a 4 day prove is my usual go-to.
If you want to do less than 72 hours, then go for a minimum of a 24 hour rise on the pizza dough.
Sauce, Cheese, and Toppings:
A simple marinara is all that’s needed. Crushed San Marzano tomatoes, olive oil, fresh basil, and salt. Or you can try my spinach and walnut pesto as a sauce, it’s INCREDIBLE.

My cheese recommendation would be fresh mozzarella that’s been sliced and placed between a paper towel to drain excess moisture. Alternatively fior di latte is a great option. Avoid the pre packaged grated stuff, it contains excess starch which impacts the meltability. I sometimes press out an entire ball of mozzarella and then grate this to form lovely shreds as you’ll see in the photos below. Certain supermarkets now also stock a pizza mozzarella which is a fresh mozzarella with a lower moisture content. This works perfectly too!
Choose any toppings you like, be as creative as you want to be. But the only tip here is to precook any vegetables that release moisture, e.g. mushrooms, aubergine, courgette etc. Sauté them in a pan beforehand to prevent a soggy and waterlogged pizza.
How to make the 72hr pizza dough:
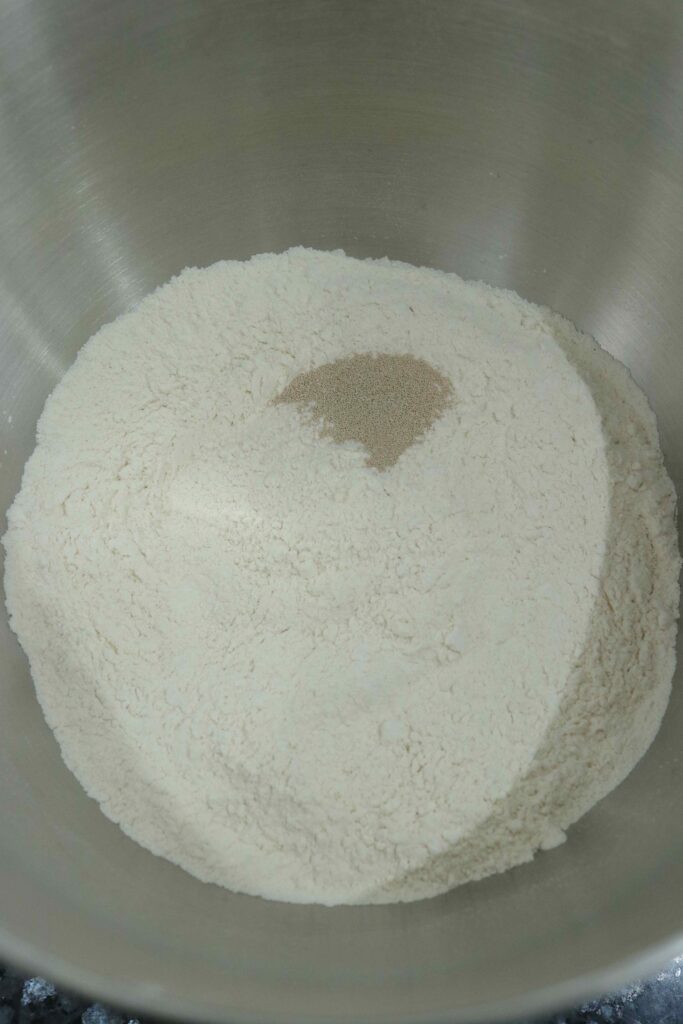

1+2) Mix flour, salt, sugar and instant yeast. Then add water. If using active dry yeast, add your activated yeast mixture.
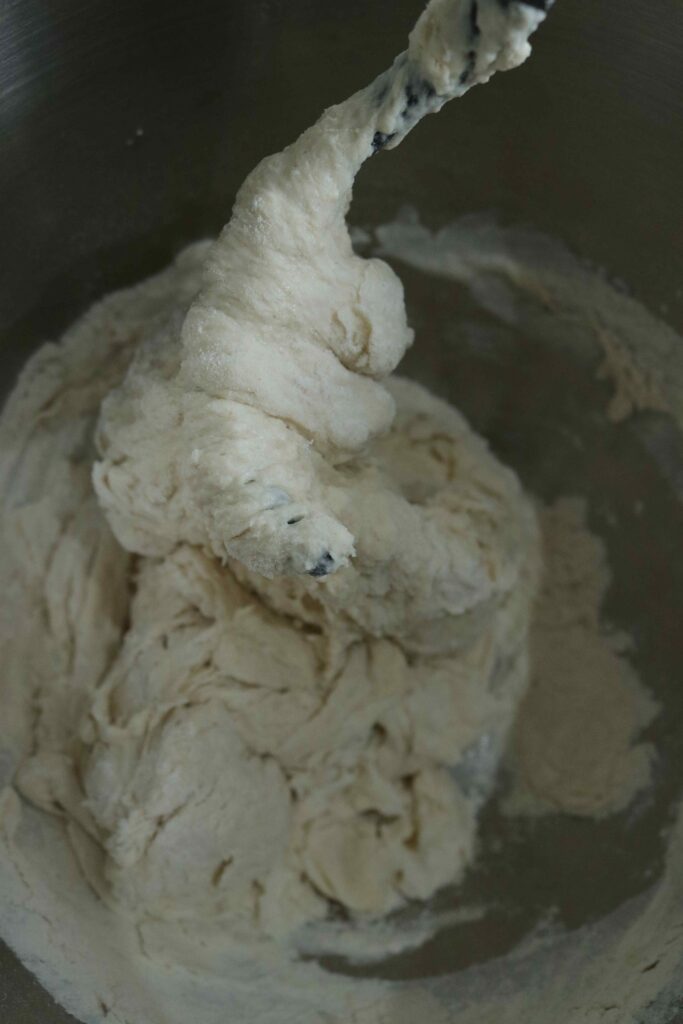
3) Mix on low speed until all the water has been absorbed
4) Then mix on medium high until the dough has started to become more smooth

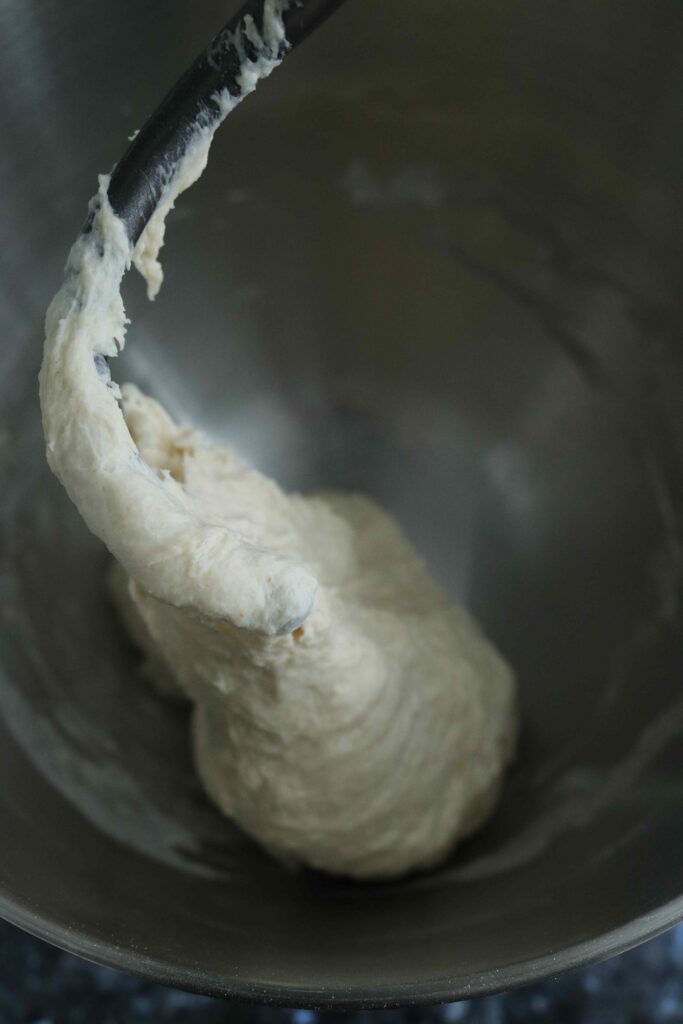
5) Once the dough has become this smooth, add in the 1tbsp of oil
6) Mix on medium speed until all the oil has been incorporated


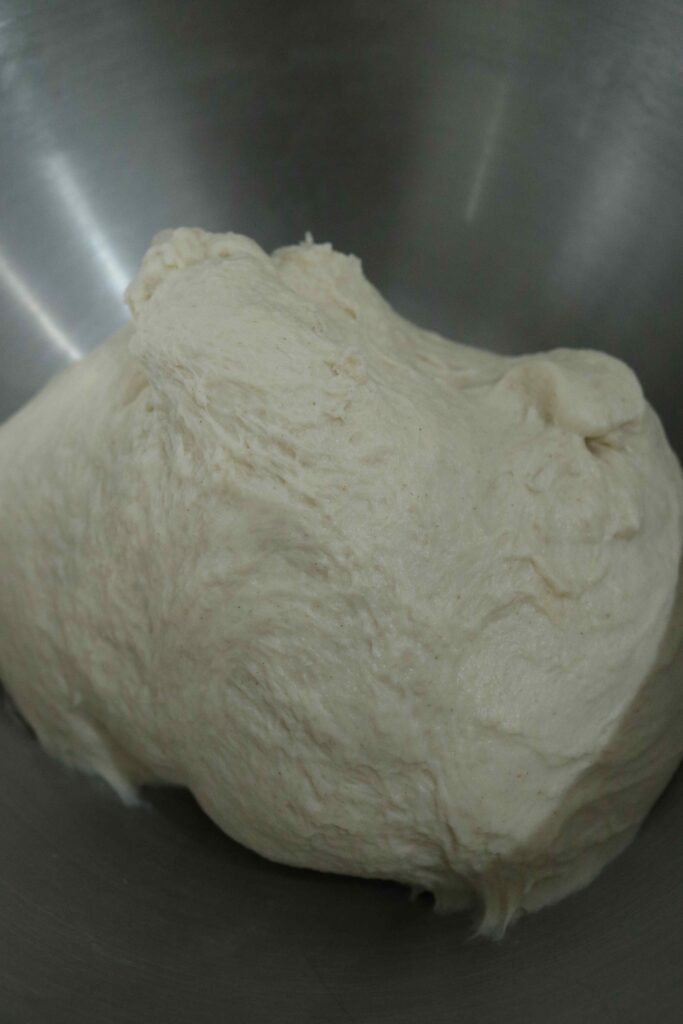
7+8) Shape the dough by folding it in on itself, always keeping the outer surface on the outside


9+10) Flip the dough over, keeping the seam side underneath. Drag the dough against the counter to tighten it
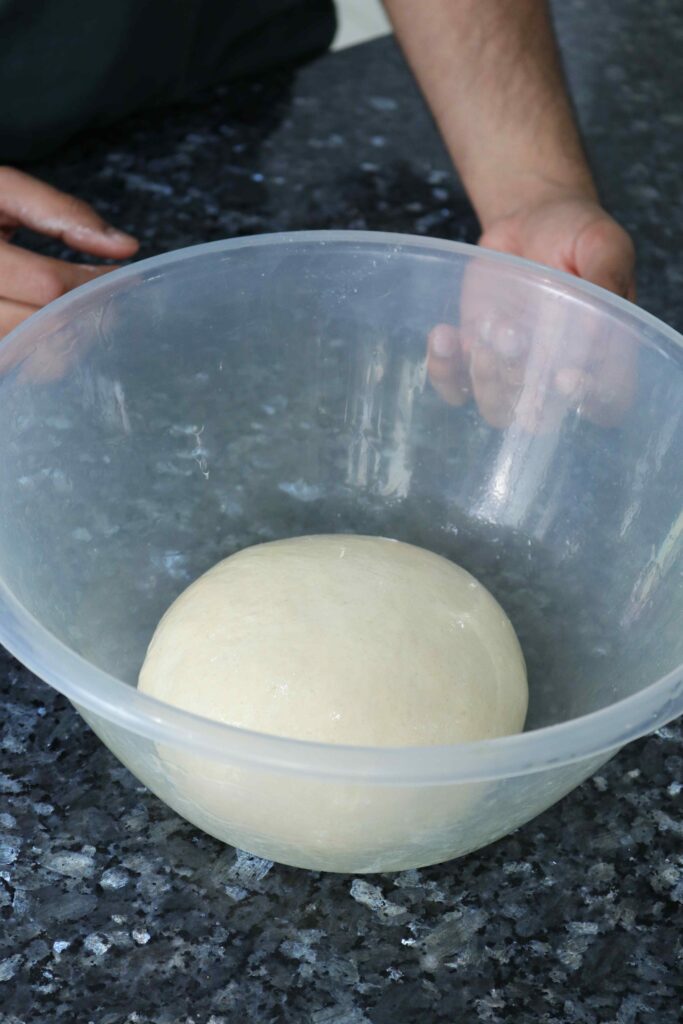
11) Transfer to a greased container. Cover with a lid or clingfilm and refrigerate for a 72 hrs
Shaping the doughballs (72 hours later):


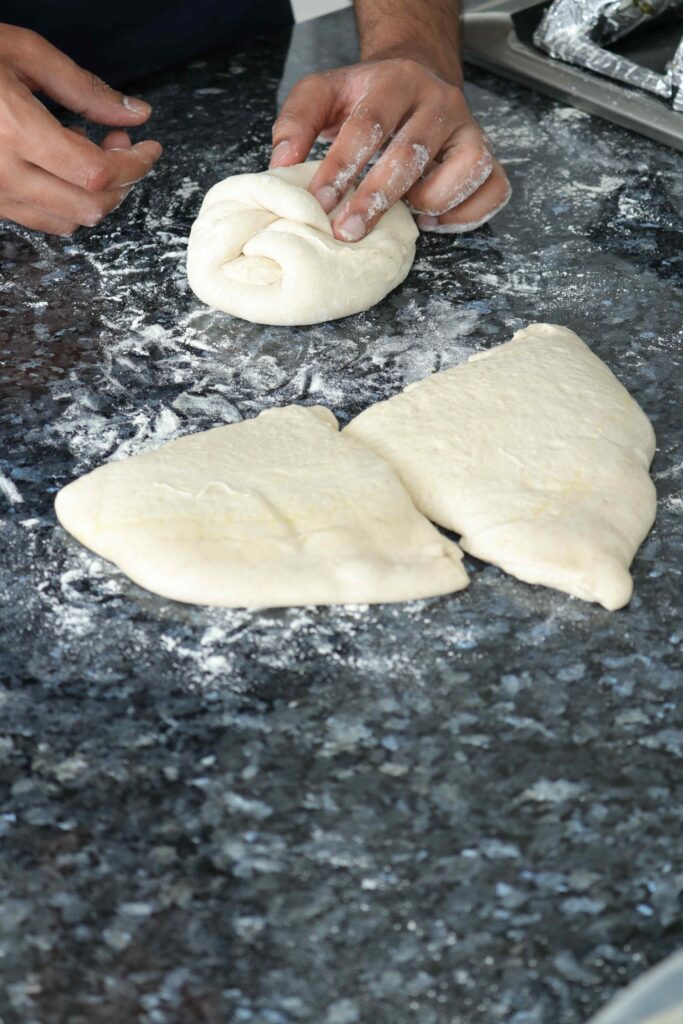
1+2) Turn the dough out onto a lightly floured surface


3) Cut into quarters
4) Start folding each piece in on itself to form a doughball
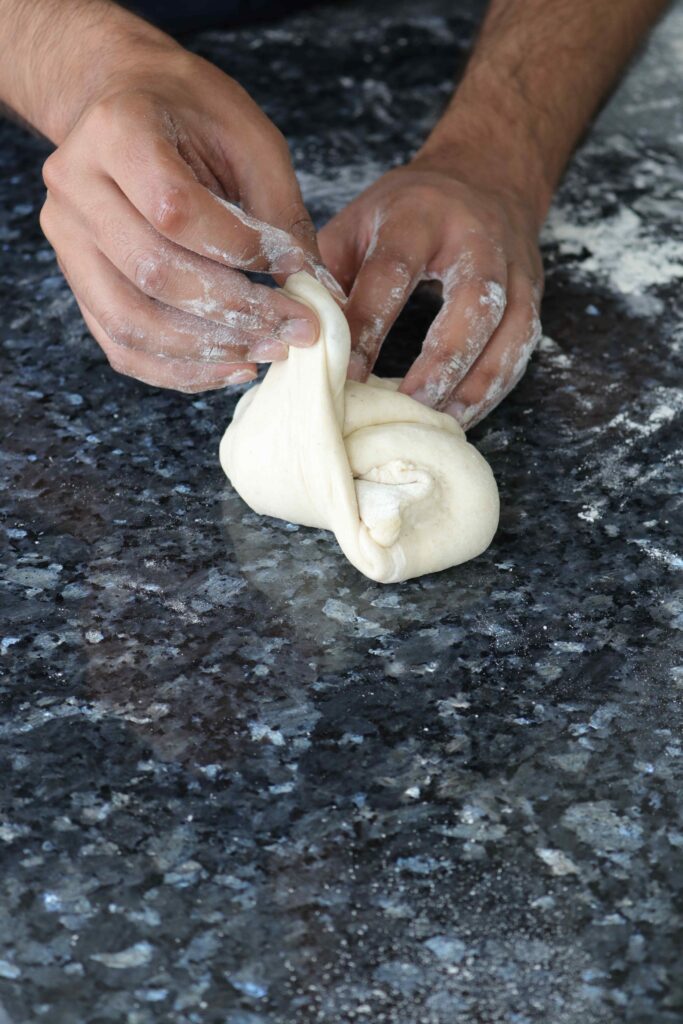
5+6) Continue folding the dough, you’ll feel the shape tighten up

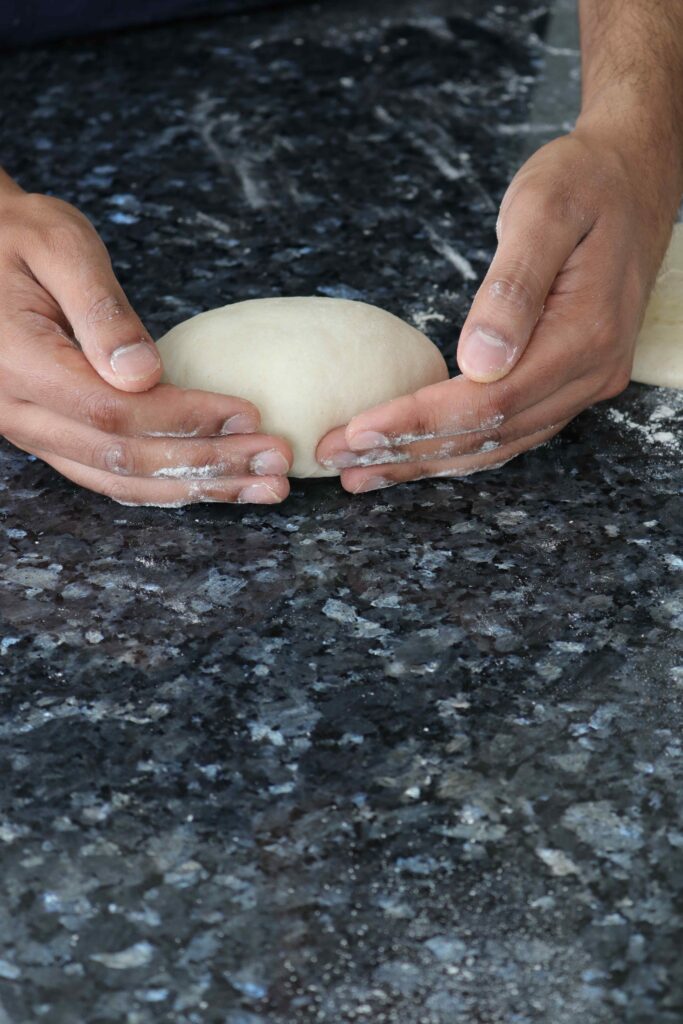
7+8) Flip the dough over so it’s seam side down. Tighten the dough by lightly dragging it across the counter
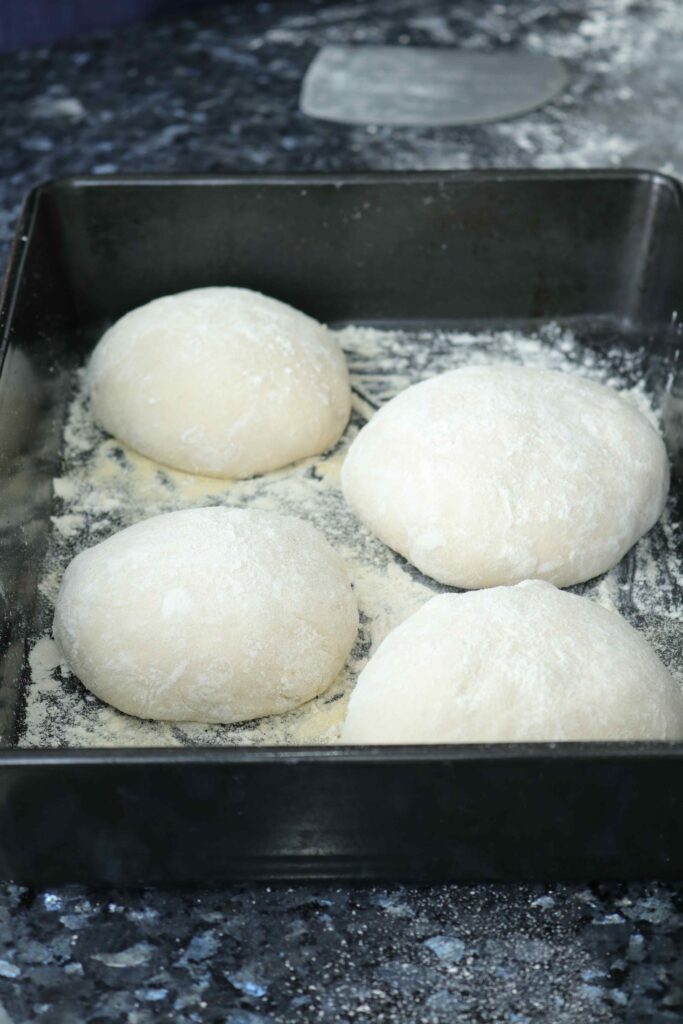
9) Place the doughballs spaced out in a floured tray. I’ve used a combination of flour and coarse semolina. Cover with a lid or clingfilm and rest for 2 hours
Shaping the pizzas (2hrs later):
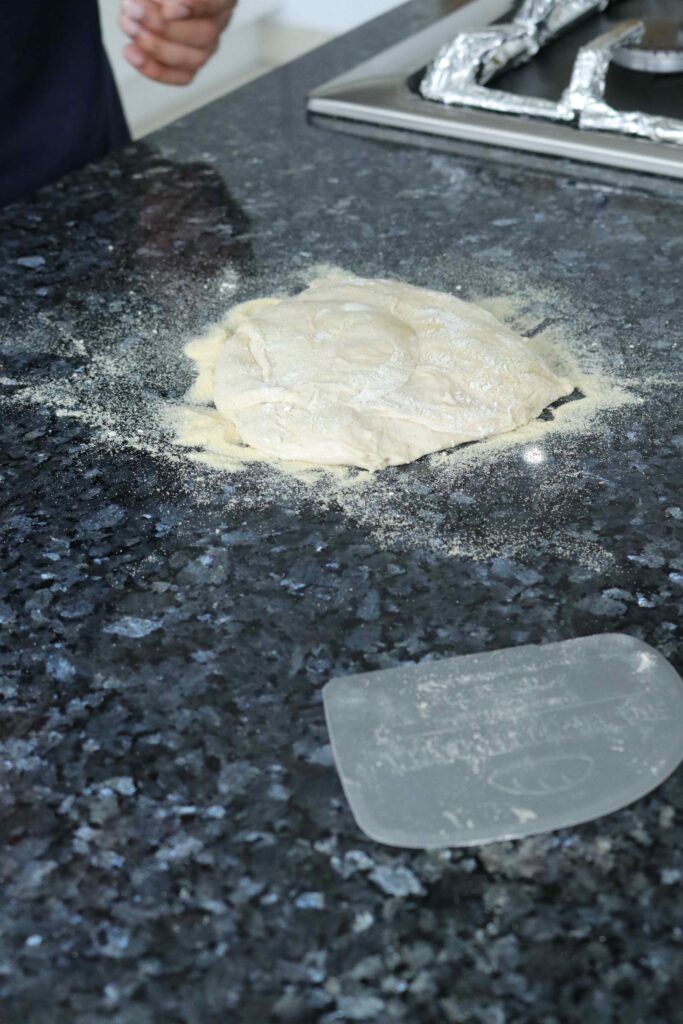

1) Transfer a doughball to semolina, don’t worry if it’s changed shape as the dough is now very relaxed. Ensure both sides are lightly coated in semolina
2) Press lightly into the dough to start shaping. Avoid the outer edge as this will become our cornicione (crust)
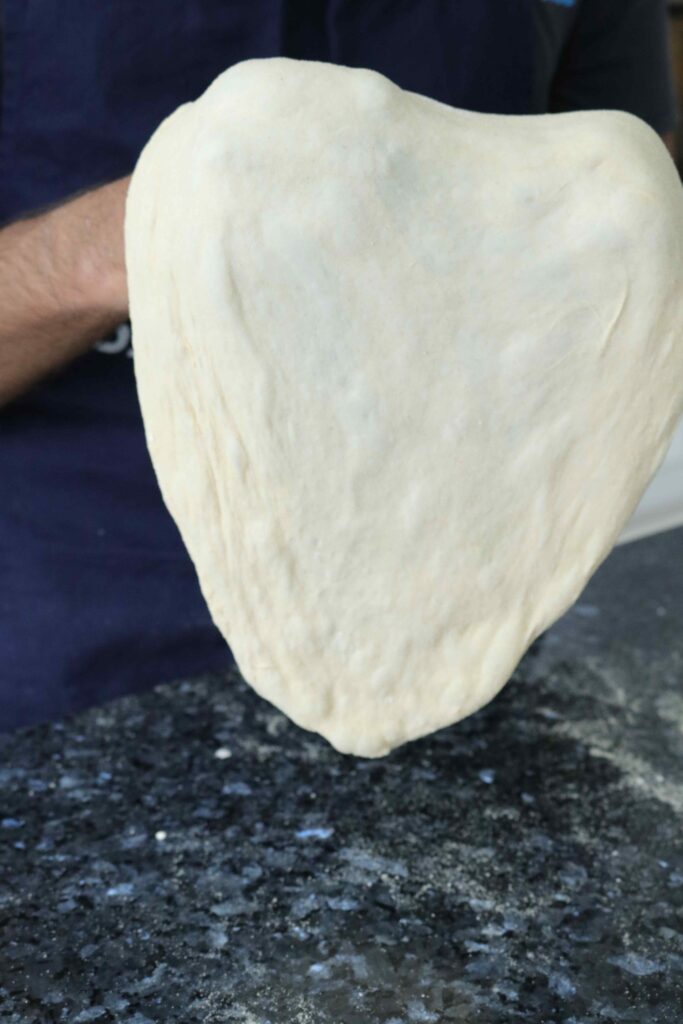
3) Use your fists to lift the pizza up and rotate slowly, allowing gravity to stretch the pizza out
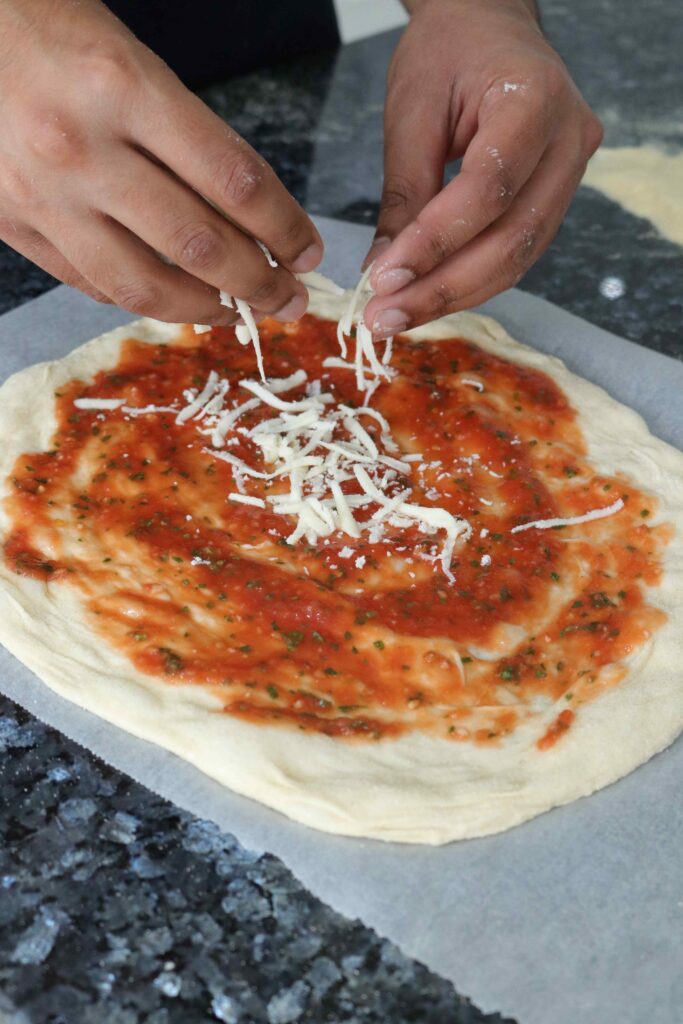
4) Transfer to a peel that’s been dusted with flour and coarse semolina, or straight onto baking paper. I use paper as it minimises any cleaning on my baking steel. Add your sauce and cheese
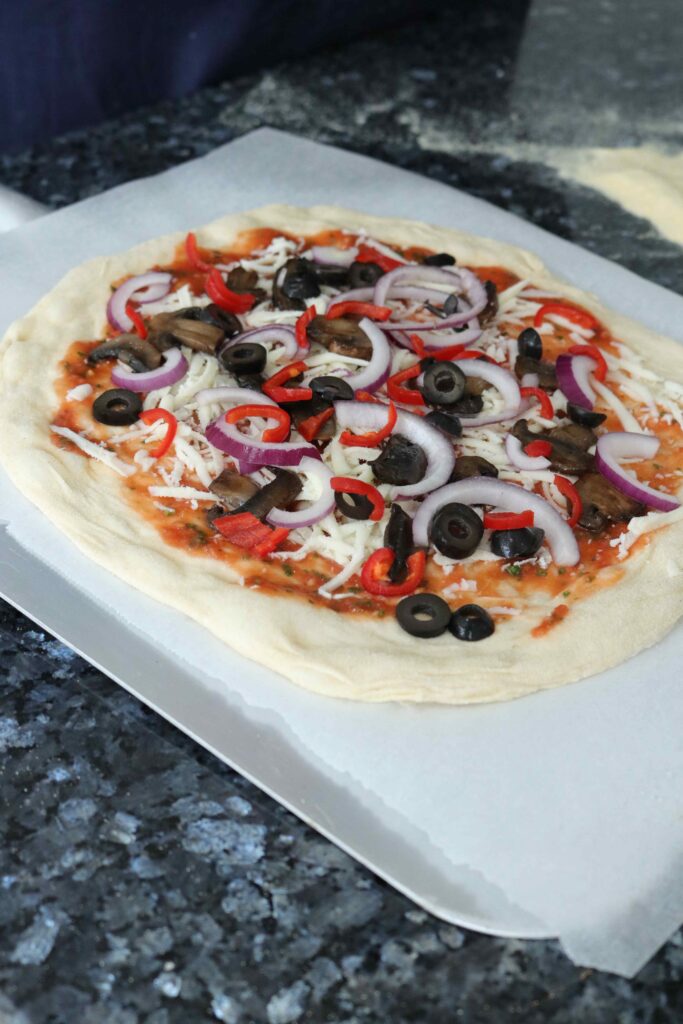

5) Add toppings of choice and slide pizza peel under the paper (if using baking paper)
6) Transfer the pizza to the oven and bake on the preheated steel/stone until some colour starts to develop on the crust


7) Now start grilling until the crust has fully browned and cheese has melted
8) Transfer pizzas to cooling racks to keep the bases crisp
Question and answers
My pizza dough didn’t rise, what went wrong?
Check your yeast as it was likely expired. If you’re using active dry yeast or fresh yeast, make sure you activate this in lukewarm water with sugar – you should see active bubbling/foaming.
Your water should only be lukewarm (slightly warm to touch) and not boiling. Boiling water will kill your yeast. Salt kills yeast so don’t mix these together directly.
Why are there 2 stages to the baking process?
This pizza gets baked and grilled. Baking allows the dough to cook through, and the grilling allows the crust to colour. It doesn’t matter which order you do this in, but the grilling usually only lasts between 1-2 minutes. I prefer grilling after baking.
I would highly recommend baking on a pizza stone, or even better a baking steel. This is because it allows a quicker transfer of heat which will reduce your baking time. This will allow the base to be more crisp as it instantly starts cooking. However, if you don’t have either of these, you can preheat an oven tray and slide your pizza directly on to it. I would strongly advise purchasing a pizza peel for easy transfer.
Can I freeze the pizza dough?
Yes, after shaping the individual doughballs you can transfer each one to an individual freezer-safe container or bag and freeze (this is immediately after shaping). These will last 4-5 months frozen.
On the day of baking, transfer the doughball to a floured tray and rest for around 5-6 hours.
My base didn’t get crispy?
There’s a few pointers here:
- Make sure you’re using a pizza stone or baking steel for best results as this transfers heat more quickly to the base
- Don’t overload your pizza with too many toppings as this will weigh it down
- Pre-cook any moisture releasing toppings (e.g. mushrooms, aubergine, courgette etc)
- Make sure to press out as much water from the fresh mozzarella as possible
- Your base wasn’t cooked for long enough. This can happen if the oven wasn’t preheated sufficiently or if you left the dough too thick when shaping the pizzas
Is there a video guide for this pizza dough?
There is a full 2 part video guide on my Instagram IGTV tab, where you’ll find the tips and run through on the process.
Can I use a pizza oven?
If you have one then YES please do! The results are incredible in a pizza oven and this is by far the best way to make these pizzas if you do indeed have one.
Can I use this pizza dough to make garlic bread?
This pizza dough will make the most incredible garlic bread. Follow the steps as normal for the dough and brush with the garlic butter before baking. To make the garlic butter, mince some garlic and mix with salted butter, olive oil, and parsley. Spread this over your base and bake. No real recipe, use your best judgement and as much/as little garlic as you like!

Cold Risen Pizza Dough
Ingredients
Ingredients:
- 500 g strong white bread flour
- 300 ml lukewarm water
- 3 g active dried yeast/2g instant yeast/5g fresh yeast
- 4 g sugar = 1tsp
- 10 g salt = 2tsp
- 2 tbsp extra virgin olive oil 1tbsp for the dough and 1tbsp for the bowl
Instructions
Method:
- Dissolve your sugar into the water, and add your yeast, allow to bloom for 10 mins. (If you're using instant yeast, this can be added directly to the flour, along with the water and sugar without needing any activation)
- Mix the flour and salt
- Add in activated yeast mix and mix to combine. If you're mixing by hand then add in 1tbsp of oil now as it will be difficult to incorporate later. If using a stand mixer, add the oil later (see images in blogpost for steps) as this allows for more gluten development to occur
- Knead for 8-10 minutes by hand or until smooth. If using a stand mixer, mix on low until the flour and liquid has incorporated, then turn it to medium high until a smooth doughball. Add the 1tbsp oil at this stage and mix on medium speed until incorporated
- Form a dough ball and place this in a large bowl that's been greased with the remaining tbsp of oil
- Cover with clingfilm or a lid and place in the fridge for 72 hrs (or at least for a minimum of 24hrs)
- After the cold rise, take your dough out and portion into 4
- Form into smooth doughballs
- Place on a lightly floured tray/lightly floured containers and leave at room temp for 2 hrs. Keep space between each one if in a tray as they will rise. Cover with lightly damp towel/cling film
- At least 45mins before the next steps, preheat your oven to 240’C fan/260’C conventional
- Start to shape your pizzas, work on one doughball at a time. Try to do this by hand rather than a rolling pin!
- Load it up with your sauce, cheese, and toppings.
- Bake the pizza until the crust has just started to develop brown spots, this can range from 3-6 minutes depending on whether a pizza stone, baking steel or preheated sheet have been used. Then turn the oven on to the grill setting and grill for a further ~2 mins or until the crust has browned and the cheese has melted.
Notes
There are a ton of variations you can do when it comes to pizza dough, this is my base recipe at a hydration level that will be easy to work with for all, if you’re confident with this recipe, feel free to start increasing the water quantity for a higher hydration dough. More water = more sticky, but again I have tips for working with sticky doughs on my Instagram highlights.
Hey Rishi, I am ardent follower of you Insta page and love your recipes n dishes you make. I am trying Pizza since long time but not got the results as airer n fluffy dough. Thanks foer the recipe in detail will try this step by step to see my pizza works. Cheers
Thank you Amit, hopefully you’ll find the added images on the website easy to follow to achieve that airy crust! I definitely recommend purchasing a pizza stone or a baking steel, it makes a huge difference.
Incredible recipe with all teh details and steps explained so well. As Rishi this 3 day wait is definitely worth the wait. If you want great tasting pizza time and time again this is all you need
Thanks Visal, this truly makes my day to read! As a super passionate pizza maker (and eater), I’m chuffed that you share the same sentiments. Thank you for leaving such a kind review!
Amazing recipe Rishi! We loved that you took the time to add images alongside the instructions – this really helped to keep us on track! Definitely worth the 72 hour wait! The dough was beautifully crisp, filled with the best looking air pockets in the crust. Cannot fault this recipe and can’t wait to make this again. Simply the best pizza I’ve made (and tasted!). Thank you for sharing!
Thank you for the unbelievably kind review Ravi! Means a lot to read this, and I’m super chuffed you found the photos handy. I find it easier to follow visual steps so I like to add them in for people who also learn in the same way 🙂 You’re a pro pizza maker already! I’m so humbled by your review, many thanks!
I absolutely love this recipe! very easy to follow and as long as you have some time, patience and the right ingredients you really can’t mess this up. I’ve made this dough twice, once for 48 hours and then 36 hours rests. Both times came out great with the rise. I’d say if your new to pizza dough when it’s time to create your pizza shape DO NOT totally flatten it. You’ll lose all the air pockets and have flatter, denser crumb pizza than if you gently from the center push out the dough to become thinner in the center while creating an airy crust. Also, we used a small single pizza oven for 12″ pizzas, and the fire time was only about 5-8 min per pizza, so all 5 of us had our pizzas ready in no time:) Thank you Rish for such a great and thorough recipe.
Been making pizzas for the last 4 years with my ooni oven. My sourdough was in the fridge for 5 months and it was really lazy. I did not have time to get it active enough to make 8 pizzas for a family gathering. I found your recipe and took a chance with it untested for the gathering. I increased the instant yeast by an additional 1 g because I only had 15 hrs in the fridge instead of the 72 required. It came out amazing. The dough was a little difficult to stretch but still, the crust was light, and crispy with lots of air pockets in the cornicione. Rave reviews with all the guests. Most of the pizzas were eaten with only 2 pieces left. We had to push the dessert later in the evening as we were all sooooo stuffed.
By far my favourite dough recipe I’ve tried so far!
thank you so much Morgan! There will be some updates to the blog coming fairly soon if you’ve mastered this dough and want to try an updated version!
Hi I’ve just made the pizzas and they were incredible ! Thanks
I’m so glad you enjoyed them! Thank you for taking the time to leave a review! best, Rish
I have tried numerous recipes. This is now my go to. Exactly what i was looking for.
I made it with 75% hydration. While a little difficult to work with, I loved the results.
This should be every home pizza makers go to guide. If you follow this guide to the letter you will have perfect pizza’s.
Mine turned out better than 90% of the pizzeria’s I have ate at.
Only thing that did not turn out how I wanted was the cheese. To get the crust to get nice and crunchy I had to over cook the cheese.
Would like some tips on that one. I wish I could post pics here because the results for a first timer were perfect!
By “Grill” do you mean “Broil”, i.e. heat from the top only? “Grill” in the US means to cook from the bottom over an open “grill” as in a charcoal barbeque.
yes, the UK grill setting on our ovens is the same as broil in the US